|
 Note from Editor: This project is another in our Tribute to Tinplate(tm)" series, which commemorates the classic tinplate villages and trains that surrounded so many Christmas trees in the early 1900s. Note from Editor: This project is another in our Tribute to Tinplate(tm)" series, which commemorates the classic tinplate villages and trains that surrounded so many Christmas trees in the early 1900s.
In 2009, after a great deal of research, Howard Lamey and I put together an article on building vintage-style houses inspired by the old Lionel tinplate houses of the early 20th century. A few months later, Howard came up with an idea for using the basic shape of that structure for an entirely different use. It turned out that Howard was even inspired by a different "original" - the Plasticville Cape Cod house that Bachmann has been making since the 1950s. The photo below shows the Lionel-inspired houses flanking Howard's Plasticville-inspired house.
A photo of the original structure that inspired this project is shown at the left. I'll try to get a better photo next time I see one at a train show.  You can tell that Howard didn't attempt to reproduce the Plasticville structure, as much as he applied ideas from that structure to his own creation. You can tell that Howard didn't attempt to reproduce the Plasticville structure, as much as he applied ideas from that structure to his own creation.
As you can see, the new addition looks great alongside the old ones. In fact, you'll often see this effect in old neighborhoods, where the builders used the same basic plan to make several buildings but they would turn some around or use different shaped porches or whatever, to make each structure look unique.
Here's an irony - I once owned a red-roofed version of the same Plasticville house that inspired Howard. It sat in a corner of my American Flyer railroad in the 1960s, but was long since sold to a collector. In fact, I didn't even know that Bachmann had made a blue-roofed version until I saw Howard's. Since Howard already has red- and green-roofed versions of the Lionel-inspired cottage, blue made more sense, anyway.
Finally, Howard made low-resolution graphics for his version, but he asked me to come up with high-resolution graphics for this article. That's one reason the graphics below look a little different than the graphics on Howard's building.
- Paul
Building a Vintage Cape Cod House
A few months after completing the Lionel-inspired houses shown in the little photo above, I was struck by the potential of a Plasticville structure I came across. We aren't doing a "Tribute to Plastic" series, though, so I adapted several ideas from the Plasticville Cape Cod house, but kept the proportions of the Lionel-inspired houses.
What You Will Need
- Clean solid cardboard, such as from posterboard. In this case, I recommend white posterboard for the building's walls. For the roof, I like to use a thick cardboard, like the back of a writing tablet.
- Corrugated cardboard for the base and building foundation
- A sharp mat knife or Xacto knife
- Elmer's white Glue-All. A glue stick would also come in handy.
- Several sheets of acid-free white bond paper
- Light card stock for printing the graphics (optional)
- Green paint for the base
- Acrylic paint for the underside of the roof. I mixed a color that was about the same as the darkest shingle on the roof.
- Access to the Internet and a color printer.
- Clear glossy acrylic finish to help give a metallic appearance and protect the graphics when you are finished.
For a more comprehensive list of tools and supplies that come in handy on any cardboard house project, please refer to our article What You Need to Build Glitterhouses.
A Note about Scale
Many early O-gauge and O27 trains are more like toys than models, so the "scale" of the trains and accessories are all over the map. In most cases, the S scale version works best with Marx O gauge tinplate trains, S gauge trains, and Christmas Villages. But you probably want to do a "mockup" first to be sure. Choose the scale you feel mostly likely to prefer, and print out a copy of Paul's graphics for that scale in black and white (saving your color cartridges). Then cut and fold the printout to make a mockup you can set next to your trains and other accessories before you begin the final structure.
By the way if you want a larger version to go with Standard Gauge or Large Scale trains, contact Paul and tell him what you need. Or you might be able to print the S-scale graphics at 2X on a large format printer. But those files are just too big to host permanently.
Dormer Option - In case you want to add a dormer like the Lionel-inspired houses have, Paul has added the graphics for that. We haven't done the plans for that, but you should be able to create your own plan based on the graphic pattern. Also, the dormer graphics Paul has added are a bit wider than the original dormer, so the "dormer roof pattern" will be too small - you'll have to make your own, once you try out the dormer and see if you like it.
Print the Patterns
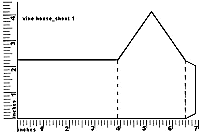
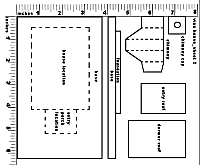
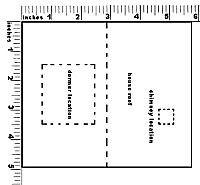
This project has a structure pattern that you will need to cut out and transfer to cardboard, as well as graphic sheets that you will use to finish the building's appearance. Again, doing a mock-up to make certain the finished structure will look right with your existing equipment may save you some trouble.
You may print the structure pattern on any sort of paper, since you're simply using this to transfer the plan to your cardboard medium. However the "lithograph" graphic should be printed on acid-free heavy paper or card stock.
Note: Some of these graphics are so large that for the O scale version we had to split them into two files. If you're working on an O scale structure, and you can't find one of your printouts, please doublecheck to make certain you printed each O scale file.
For Optimum Printing - We have used professional "vector" graphics when possible to make certain that you get the highest resolution graphic, whatever scale you use. In most cases, you can get the best result by right-clicking on the text name of the graphic you need, then saving the pdf file to your hard drive. That way you won't have to download the file again if you accidentally print the plans or graphics the wrong size, which is easy to do with some printers.
Then navigate to the folder with the graphics and click on the file name. Adobe Acrobat Reader should open up. Make certain that the graphic is set to print at 100% and that "scale to fit" or some such option is not checked.
Structure Patterns
Graphic Files
If you can't get the graphics to work the way you need them to, contact
Paul and ask him for help - that's his department. :-)
A note about Copyright - However you use these plans and graphics for your personal use, please keep in mind that the lithograph graphics are copyright by Paul Race and are not to be copied, re-used, republished, or repurposed without prior permission and appropriate credit. Commercial use without prior permission is illegal and expressly forbidden. Paul likes making resources like this available to hobbyists, but they are expensive and time-consuming to produce and publish, and it's frustrating to see other folks profiteering off his hard work. In other words, if you like having this kind of resource available and you'd like to see more, please respect the creator's rights.
Cutting and Scoring the Frame Pieces
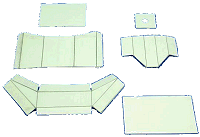 Transfer the plans you have chosen to appropriate pieces of cardboard. In most cases, a thick, solid piece like the back of a writing tablet is best. Using a Xacto-type knife and a straight edge, carefully score every place where a fold is indicated. Then cut the pieces out. As an example, the dormer, porch, and chimney pieces in the photo to the left have been scored and cut out. Transfer the plans you have chosen to appropriate pieces of cardboard. In most cases, a thick, solid piece like the back of a writing tablet is best. Using a Xacto-type knife and a straight edge, carefully score every place where a fold is indicated. Then cut the pieces out. As an example, the dormer, porch, and chimney pieces in the photo to the left have been scored and cut out.
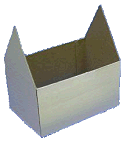 Building the House Frame Building the House Frame
I cut out the backing pieces for the side and end walls before I mounted the graphics to them. Note that you should adjust the lateral measurements of the backing pieces so that they are slightly less than the size of the lithograph sheet.
I scored the folds and glued the walls together in a rectangle. Then I carefully applied the "wrap" to one wall at a time, starting with the ends. To keep "bubbles" from developing, spread a thin layer of glue across the entire surface to be glued. Consider using clothespins or the like to make certain the wrap doesn't shift during the drying process.
I apologize for not having photos of this stage or the next two, but my "experimental" project worked so well, I didn't get around to building another one just to take photos like I sometimes do. There are photos showing these stages in the original article, but of course the graphics are different.
Building the Roof
Once you have the house walls built up as shown above, cut a piece of scrap cardboard to test the fit of the roof. When you decide exactly how large you want it, measure carefully, and be certain to score where the tip of the roof will be before you cut out the outside edges.
Fold the roof carefully and glue the shingle graphic on the roof piece, again making certain that a thin layer of glue completely covers the surface to be glued, so that no bubbles may form. You may find it more precise to glue one surface of the roof, let it dry, then fold the roof to the correct angle, and figure a way to brace it there before you glue the other surface down.
Make certain that as the glue dries, the roof stays bent at the correct angle to fit over the structure properly.
When the glue is dry, turn the roof upside down and carefully trim the excess graphic paper. Then paint the edges and underside of the roof with the color you have chosen.
Building the Dormer (Optional)
Once you have the roof ready to glue onto the building (or at least to sit on it), print the dormer graphic for the size you need and test it to decide if it sits right on the roof. Make any adjustments that are necessary, then use the graphic to make a pattern for the cardboard backing. Cut out the cardboard. Glue the graphic on, starting with the center panel, then doing the "wings."
Experiment with the size of the dormer roof. When you have a size you like, cut out a cardboard rectangle for the backing. Then cut out a bit more of the roof pattern for the dormer roof. Finish the dormer roof like you did the roof, including trimming the graphic and painting the underside and edges.
Building the Chimney and Cap
- Transfer the pattern for the chimney and cap to cardboard.
- Score fold lines, cut out the pieces and fold on the score lines
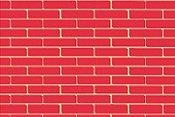
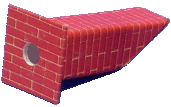 Apply the printed brick graphic. I wrap the cap something like a christmas package, so that the seams are underneath, not on the top or edges. Apply the printed brick graphic. I wrap the cap something like a christmas package, so that the seams are underneath, not on the top or edges.
- Glue the chimney together. When all of the glue is dry, glue the cap onto the chimney.
- The white edges of the paper may show. With an appropriate color felt-tip pen, marker or acrylic paint and a very tiny brush, carefully coat just the edge of paper and touch up as needed.
Building the Base and Foundation
The base is a rectangular "box" built up from corrugated cardboard. The building foundation can be made from foam board or corrugated cardboard. It must be cut to fit just inside the cottage. Eventually it provides plenty of surface for glueing the building to the base.
- Make the base from three or four layers of corrugated cardboard glued together in a sandwich.
- Wrap and glue a strip of cereal-box cardboard all around it to camouflage the rough edges of the corrugated cardboard.
- When the base is built, cover it with white bond paper just like you would wrap a gift, except that all surfaces of the paper cover must be glued down to the box. A glue stick works great for this.
Note: For more information about building bases for vintage-style cardboard houses, please see our Glitterhouse Bases article.
After you have built the base, cut the foundation piece out of corrugated cardboard and set it loosely on the base. Position your structure over it to make certain it is a secure, but not overly tight fit.
Painting the Base
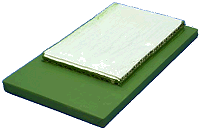 Once you're certain of the fit, prime the base and paint it with several coats of paint in the color of your choice. Do not glue the foundation in place until you have built the cottage and made sure of the fit, however. Once you're certain of the fit, prime the base and paint it with several coats of paint in the color of your choice. Do not glue the foundation in place until you have built the cottage and made sure of the fit, however.
Assemble the Structure
Once you have tested all of the fits, it's time to glue your structure together. Work on a piece or two at a time, so you're sure one part isn't sliding out of place while you're paying attention to something else. Again, the hurry-up-and-wait aspect of this stage of the project is reduced if you are working on two buildings at once.
Finish
Once again, your finished product won't look quite like this one, since Paul's graphics have more detail (and a few more windows) than the ones I used. But the photo below right should give you a pretty good idea of what to expect.
 Wait until the glued-on graphics are thoroughly dry, then spray the structure. Use several light coats of a clear glossy indoor/outdoor acrylic finish. This protects it somewhat from moisture and dust and also helps reduce fading. In addition, it makes the lithography pattern "pop." Do not such a heavy coat in one pass that you cause any streaks, runs, or drips, though, or you'll have to start over. Wait until the glued-on graphics are thoroughly dry, then spray the structure. Use several light coats of a clear glossy indoor/outdoor acrylic finish. This protects it somewhat from moisture and dust and also helps reduce fading. In addition, it makes the lithography pattern "pop." Do not such a heavy coat in one pass that you cause any streaks, runs, or drips, though, or you'll have to start over.
Of course the structure will really come to life when you add accessories and put it into some sort of setting, even a simple one.
Conclusion
If you like this project, stay in touch - more are on the way. In the meantime, you might like to take a look at the following projects.
 New Feature! - "Tribute to Tinplate" Articles
Here's our index to the "Tribute to Tinplate" projects, which commemorate the beautiful lithographed metal trains and towns of a century ago. Free downloadable commercial-grade graphics and instructions will help you inexpensively add an authentic vintage look to any indoor railroad. Most projects have multiple pre-scaled plans and graphics, plus scalable graphics for the smaller scales, so you can easily add a vintage look to ANY railroad or holiday village, no matter what size your trains and towns are. We have more on the drawing board, so be sure and check back. New Feature! - "Tribute to Tinplate" Articles
Here's our index to the "Tribute to Tinplate" projects, which commemorate the beautiful lithographed metal trains and towns of a century ago. Free downloadable commercial-grade graphics and instructions will help you inexpensively add an authentic vintage look to any indoor railroad. Most projects have multiple pre-scaled plans and graphics, plus scalable graphics for the smaller scales, so you can easily add a vintage look to ANY railroad or holiday village, no matter what size your trains and towns are. We have more on the drawing board, so be sure and check back.
 Building the Tin City Bridge -
Add an eye-popping feature based on the classic Lionel Standard Gauge bridges. Works great with collectible villages, vintage O and S-gauge trains, On30 trains and more! Free downloadable plans, graphic files, and step-by-step instructions are provided. New, October, 2009! Building the Tin City Bridge -
Add an eye-popping feature based on the classic Lionel Standard Gauge bridges. Works great with collectible villages, vintage O and S-gauge trains, On30 trains and more! Free downloadable plans, graphic files, and step-by-step instructions are provided. New, October, 2009!
- Building a Vintage Tin-Style Cottage
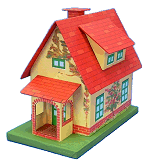 - This project is inspired by a popular pre-war tinplate house that was made to go with standard gauge trains, like the early 1900s-era Ives and Lionel. Our own commercial-quality graphics and instructions, as well as Howard Lamey's plans and assembly details are all free, to give your railroad a vintage tinplate look with a few cents' worth of materials. Many options are available, and most graphics and plans can be downloaded directly from the article. New, July, 2009! - This project is inspired by a popular pre-war tinplate house that was made to go with standard gauge trains, like the early 1900s-era Ives and Lionel. Our own commercial-quality graphics and instructions, as well as Howard Lamey's plans and assembly details are all free, to give your railroad a vintage tinplate look with a few cents' worth of materials. Many options are available, and most graphics and plans can be downloaded directly from the article. New, July, 2009!
 Building a Vintage "Lithograph" Station
Our first "Tribute to Tinplate" article pays tribute to the lithographed stations of a century ago. Free downloadable commercial-grade graphics and instructions are available in several scales. Instructions for building this project inexpensively from scrap cardboard are also included, although you could build it from tin if you really wanted to. Building a Vintage "Lithograph" Station
Our first "Tribute to Tinplate" article pays tribute to the lithographed stations of a century ago. Free downloadable commercial-grade graphics and instructions are available in several scales. Instructions for building this project inexpensively from scrap cardboard are also included, although you could build it from tin if you really wanted to.
 New
Feature - Building a Tinplate-Inspired Lamp Post The ideal accessory for the Lewis Park Station, or any station or city hall on your railroad or holiday village. No, they don't actually light, but they are cheap and easy to build and add a great deal of vintage interest to any setting. Free downloadable plans are available in several scales. New
Feature - Building a Tinplate-Inspired Lamp Post The ideal accessory for the Lewis Park Station, or any station or city hall on your railroad or holiday village. No, they don't actually light, but they are cheap and easy to build and add a great deal of vintage interest to any setting. Free downloadable plans are available in several scales.
 New
Feature - Building a Tinplate-Inspired Watchman's Shanty Back in the day before automated crossings, these were common sites alongside busy rail crossings. Howard's exclusive design pays tribute to a series of tinplate structures that go back a hundred years and include three different scales. His free plans and instructions will help you dress up any indoor railroad or holiday village. New
Feature - Building a Tinplate-Inspired Watchman's Shanty Back in the day before automated crossings, these were common sites alongside busy rail crossings. Howard's exclusive design pays tribute to a series of tinplate structures that go back a hundred years and include three different scales. His free plans and instructions will help you dress up any indoor railroad or holiday village.
 New
Feature - Building a Tinplate-Inspired Railroad Crossing Sign This is the ideal accessory for the Watchman's Shanty project. Based on a series of products that are now available only as expensive collector's items, this easy and almost-free project will add texture, interest, and period to any model railroad or holiday village. New
Feature - Building a Tinplate-Inspired Railroad Crossing Sign This is the ideal accessory for the Watchman's Shanty project. Based on a series of products that are now available only as expensive collector's items, this easy and almost-free project will add texture, interest, and period to any model railroad or holiday village.
- Easy Street Scene - This new
 building project uses downloadable building graphics and a little cardboard or foam board to build up a convincing downtown scene that is only a few inches deep - perfect for shelf layouts, tight spots, and dioramas. We also provide links to high-resolution graphics that will work for any scale. building project uses downloadable building graphics and a little cardboard or foam board to build up a convincing downtown scene that is only a few inches deep - perfect for shelf layouts, tight spots, and dioramas. We also provide links to high-resolution graphics that will work for any scale.

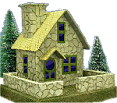 Build a Vintage-Style Cardboard Stone Cottage - This building project is made like the vintage cardboard houses folks used to set around their Christmas tree in the early 1900s (before glitterhouses became common), but its design was inspired by a building that shows up on the "Isle of Sodor." The building uses free downloadable graphic paper to put a realistic stone veneer on an old-world cottage and fence. It works with Christmas villages, or with a little customization, would dress up any indoor railroad. A "brick cottage" option is also shown.
 Log Cabin Building Flat - This "building flat" uses downloadable graphics and foam board or cardboard to dress up a narrow corner of your railroad or village. The techniques in this project can be used for almost any kind of building you want to represent in a tiny space. December, 2007 Log Cabin Building Flat - This "building flat" uses downloadable graphics and foam board or cardboard to dress up a narrow corner of your railroad or village. The techniques in this project can be used for almost any kind of building you want to represent in a tiny space. December, 2007
- Build a Vintage-Style Barn and Silo - This
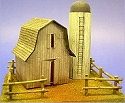 building project uses downloadable graphics to put realistic shingles and siding on an old barn and silo. Like the stone cottage above, it works with Christmas villages, or with a few changes, it would dress up an indoor railroad. building project uses downloadable graphics to put realistic shingles and siding on an old barn and silo. Like the stone cottage above, it works with Christmas villages, or with a few changes, it would dress up an indoor railroad.
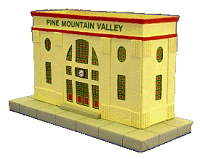 Building the Union Station - This original project by designer Howard Lamey is inspired by two traditions - the cardboard Christmas houses that were popular in US homes between 1928 and 1965 and the Lionel station that was popular for most of the 20th century. Building the Union Station - This original project by designer Howard Lamey is inspired by two traditions - the cardboard Christmas houses that were popular in US homes between 1928 and 1965 and the Lionel station that was popular for most of the 20th century.
Other Articles about cardboard houses include:
|


|

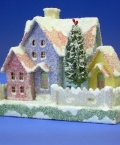


 You can tell that Howard didn't attempt to reproduce the Plasticville structure, as much as he applied ideas from that structure to his own creation.




 New Feature! - "Tribute to Tinplate" Articles
 Building the Tin City Bridge
 Building a Vintage "Lithograph" Station
 New
Feature - Building a Tinplate-Inspired Lamp Post
 New
Feature - Building a Tinplate-Inspired Watchman's Shanty
 New
Feature - Building a Tinplate-Inspired Railroad Crossing Sign


 Building the Union Station


