
|
||||
| Your source for custom-made, handcrafted Christmas village houses and churches | ||||
| HOME PAGE |
PHOTO GALLERY |
ORDERING DETAILS |
ABOUT THE CRAFTSMAN |
HOUSE KIT |
HOWARD'S HOW-TO'S |
FAVORITE LINKS |
| Written by Howard Lamey (with a little help from Paul Race) for Big Indoor Trains™ and LittleGlitterhouses.com. |


|
Building a Vintage-Style Cardboard Stone Cottage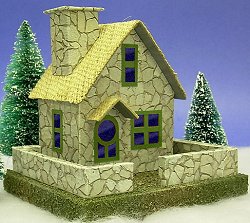 This stone cottage project is designed to look right with "Christmas Villages," both the new ceramic and resin kind, and the original cardboard and celophane kind that was especially popular between World Wars. That said, if you want it to look more like a model with O scale trains, you might want to blow the plans up by about 2x and substitute another finish (such as the Rough Cedar Shakes pattern) for the roof. However most of the construction is very similar to building a glitterhouse, so we will refer to articles on glitterhouses in general from time to time. This stone cottage project is designed to look right with "Christmas Villages," both the new ceramic and resin kind, and the original cardboard and celophane kind that was especially popular between World Wars. That said, if you want it to look more like a model with O scale trains, you might want to blow the plans up by about 2x and substitute another finish (such as the Rough Cedar Shakes pattern) for the roof. However most of the construction is very similar to building a glitterhouse, so we will refer to articles on glitterhouses in general from time to time.
What You Will NeedIf you are going to build cardboard houses, stop throwing away used, clean cardboard yesterday. Save cereal boxes, the backs of writing tablets, anything flat, firm and clean, that you can save. In addition, for this project you'll need:
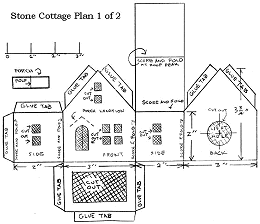
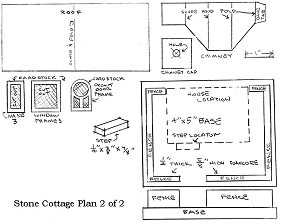
Print The PatternsThis project has a structure pattern that you print out and transfer to cardboard, as well as a texture sheet that you print out and use to finish your cottage's appearance.You may print the structure pattern on any sort of paper, since you're simply using this to transfer the plan to your cardboard medium.
Printing the Plans - We've provided two versions to help you print the plans at the size you need.
If neither of those work, contact Paul and ask him for help - that's his department. :-) Printing the Patterned Paper - The stone pattern used in this project is from the Big Indoor Trains™Building Texture pages. If you would like to try a different pattern, please check them out. In the meantime, the following patterns will give you the same graphics used in this project. Print each on acid-free bond paper at the highest quality setting your printer allows.
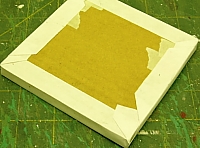
Note: If you are interested in building for larger scales, you will find larger versions of the same patterns at the Family Garden Trains™Building Textures page. Building the BaseThe base is a rectangular "box" that is decorated before the building and fence are installed. It should be about 4" x 5" x 1/2".
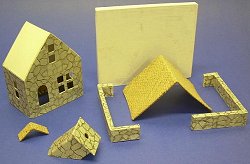
Building the Building
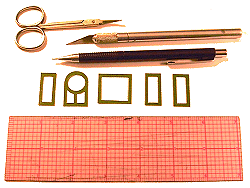
Cut these from thin cardboard or cardstock.
|
|  |
Conclusion
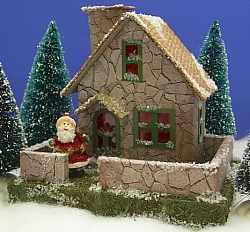
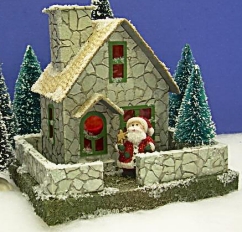
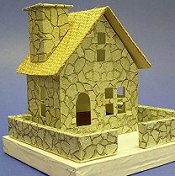
I can use this building in my “Pine Mountain Valley” Christmas display village and railroad just by adding a handful of artificial snow to the roof and base. Or I can use it year-round in other displays.
 The Big Indoor Trains™ Resource pages include several other downloadable, cleaned-up building texture pages in several size ranges for you to use for similar projects:
Commercial "Plug"
A Note from the Designer: Now that I'm in "retirement," this hobby has become a sort of avocation for me. Several folks have commissioned me to build specific houses for them. So if you'd like me to "bid" on a cardboard house for you, or if you have any questions at all, please visit our Orders page. - Howard
Also, if you have a similar project you'd like to share with your fellow readers and hobbyists, we'd love to add it to our site, and we'll be sure to give you full credit for your contribution.
Other Resources for Putz Houses and Related Information
- Other Putz House Articles:
- Building Glitterhouse Bases
- What You Need to Build Glitterhouses
- What is a Glitterhouse? - The BigIndoorTrains™ introduction to the hobbies of collecting and building glitterhouses.
- Building a Vintage-Style Cardboard Halloween House
- Other Putz House Resources:
- "Papa Ted's Place" Ted Althof's extensive resource about vintage pasteboard houses. Includes some history, many photos from other people's collections, and resources to help you build your own. The links below will take you right to the approprate page on "Papa" Ted's site. You'll find lots of other pages to look at while you're there, though.
- Building from Scratch - "Papa" Ted Althof has collected tips and photos from other glitterhouse builders including Tom Hull and Ted Howard.
- Repair and Restoration - "Papa" Ted Althof publishes Tom Hull's tips for restoring damaged antique glitterhouses.
- Reproduction Parts - Ted offers authentic reproductions of just about every door and window that were used in glitterhouses over a 35-year period. These include celophane and paper "see-through" windows, as well as "stick-on" windows. If you don't know what sizes you need, you can order a template or sample pack. The page includes several photos showing how the replacement parts bring otherwise solid vintage glitterhouses "back to life."
- Making "Flocked" Windows - Tom Hull's method for making "fuzzy" windowframes on celophane, with additional tips by author and glitterhouse collector Antoinette Stockenberg.
- Repairing or Replacing Trees Tom's article about the "lufa" trees that were common on pre-war glitterhouses, and can be repaired or else replaced by new lufa carefully cut, soaked with dark green acrylic paint, and allowed to dry before gluing and applying white paint for "snow."
- LittleGlitterHouses.com - Putz house builder Howard Lamey now has his own site, begun in December, 2007. You can commission your own custom-built glitterhouse, or buy a precut kit and finish it yourself.
- Aimee Gomberg's original putz houses - unique collections for sale.
- "Papa Ted's Place" Ted Althof's extensive resource about vintage pasteboard houses. Includes some history, many photos from other people's collections, and resources to help you build your own. The links below will take you right to the approprate page on "Papa" Ted's site. You'll find lots of other pages to look at while you're there, though.
- Other Articles that Discuss Putzes and Christmas Villages of the mid-20th Century:
- About Nativities - Describes how German-American Nativity displays (the original "putzes") grew into communities and landscapes that included pastboard, glittered houses and even electric trains.
- What Do Trains Have to Do With Christmas - Describes how electric trains contributed to the communities many families set up at Christmas, with some details about the elaborate "Christmas Gardens" of the Baltimore/DC area.
- Author Antoinette Stockenberg's home page - includes photographs and comments on putz houses and life in general.
To return to the "Howard's How-To" page, click here.



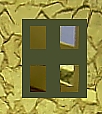 Using the same color you painted the frames, carefully paint around the edges of the door and window openings. Paint the window “mullions” (cross bars in windows) the same color also.


