

|
Note from Editor - More Tribute to Tinplate(tm): Florida hobby and craft designer Howard Lamey has created many projects reminiscent of the illuminated pasteboard houses that brightened North American households during Christmas seasons between 1928 and 1965 (often called "putz" houses from the German word for "puttering around.") This project, however, is a tribute to an even older tradition - the tinplate villages and trains that surrounded so many Christmas trees in the early 1900s. Although Big Indoor Trains™ is contributing lithograph-inspired downloadable graphics for other projects in this series, this project is entirely Howard's design. We are privileged to host the project both at Big Indoor Trains™ and at Howard's web site LittleGlitterHouses.com.
Alert readers will note that this is not Howard's first tinplate-inspired building project - in 2008, he designed a Union Station project inspired by one of Lionel's most beloved tin stations.
Although one could build these projects from sheet tin, we are making them from cardboard. Ironically, this reflects yet another tradition - when tinplate trains and towns were in vogue, Japanese companies manufactured heavily-shellacked cardboard houses and stations that you could use to supplement your empire. Today putz house collectors call these old Lionel and Ives-inspired cardboard houses "Lackies," because of the lacquer that made them almost as shiny as the metal houses that inspired them.
 Building a Tinplate-Inspired Watchman's Shanty Building a Tinplate-Inspired Watchman's Shanty
In the days before electronically-triggered crossing gates, many railroads kept an employee at busy crossings to stop traffic when a train was coming. The watchman's shanty was not much bigger than a "guard shack," but it would frequently hold a tiny stove to help the watchman keep warm in cold weather. Lionel idealized the watchman along with his shanty in a series of automated products that featured a little blue man popping out of the door waving a lantern every time the train went around the track. This project avoids the noise and electrical wiring of the solenoid-powered watchman, while retaining the charm of both the original structure and of the tinplate models.
If you've been building our other cardboard houses and related projects, you'll find the steps and materials used to be very familiar. If not, welcome to a fun and growing hobby.
What You Will Need
Clean cardboard. For the building's walls and the bottom layer of the roof, try to use something thick, but not corrugated, such as the backs of writing tablets. You'll probably want to use corrugated cardboard for the base. In addition, for this project you'll need:
- A sharp mat knife or Xacto knife (or both)
- A stiff metal ruler
- Elmer's white Glue-All. A glue stick would also come in handy.
- Several sheets of acid-free, non-yellowing, white bond paper
- Cardboard that is "corrugated" on one side only (for the roof). I used coffee-cup holders from a coffee shop. [You could also use crimped aluminum sheeting that has been "corrugated" using a Fiskars paper crimper according to our article on the subject. - Paul]
- Foam core board for the foundation (you can use corrugated cardboard in a pinch)
- Flat white paint to prime the building
- A dowel or cylinder for the chimney. For O scale and smaller, a candy-apply stick will work. For larger scales, consider something larger, like a Bic pen cylinder.
- Acrylic paint in the colors you plan to use for the station (we used a light cream color)
- Some clear or translucent material for "glazing" the windows - I used the plastic from a cereal box liner, backed with light blue paper.
- Access to the Internet and a printer
- 1/4-inch x 1 /4-inch x 1 1/4-inch piece of balsa wood or similar material for the front step.
- A straight pin or small "hat-pin"- style pin for the door knob
- Several spring-type clothes pins to hold things together as the glue dries.
- Clear acrylic glossy spray to get the shiny "metallic" finish at the end of the project.
Note: Our article on What You Need to Build Glitterhouses lists other materials and tools that will help you work more quickly and effectively.
A Note about Scale
Many early O-gauge and O27 trains are more like toys than models, so the "scale" of the trains and accessories are all over the map. A few pieces even are closer to HO (1:87) in scale than they are to O (usually 1:48). On the other hand, some accessories made to go with O27 trains are half again as large as they should be, since they're holdovers from earlier Standard Gauge products.  So if you want your tinplate-inspired projects to look right with your existing equipment, you probably want to do a "mockup" first and compare it with your existing equipment. In my case, I made my "mockup" as I was designing the shanty, as you can see to the right. I made it full sized for O scale (1:48), which is actually a larger scale than most of my O-gauge Marx trains. As it turned out, the second building I made in this series was the Lewis Park Station, which is a little smaller in scale than my shanty, but it looks better with my tinplate Marx trains. So if I was doing the shanty over again, I would consider reducing the size by 20%-25%. Paul has provided re-scaled plans that are close to S scale (1:64). This S scale version would be the best to to with Marx trains or with American Flyer S Gauge trains. Paul has also provided plans for a 1:29 shanty to go with Large Scale (garden) trains or antique Standard Gauge trains (such as the earliest Lionel and Ives trains). So if you want your tinplate-inspired projects to look right with your existing equipment, you probably want to do a "mockup" first and compare it with your existing equipment. In my case, I made my "mockup" as I was designing the shanty, as you can see to the right. I made it full sized for O scale (1:48), which is actually a larger scale than most of my O-gauge Marx trains. As it turned out, the second building I made in this series was the Lewis Park Station, which is a little smaller in scale than my shanty, but it looks better with my tinplate Marx trains. So if I was doing the shanty over again, I would consider reducing the size by 20%-25%. Paul has provided re-scaled plans that are close to S scale (1:64). This S scale version would be the best to to with Marx trains or with American Flyer S Gauge trains. Paul has also provided plans for a 1:29 shanty to go with Large Scale (garden) trains or antique Standard Gauge trains (such as the earliest Lionel and Ives trains).
Whatever scale you think you want, consider doing a mockup first to be sure you've chosen the right size. If nothing else, you can open the .jpg versions and resize them as you print to any scale you need - just make certain you resize all of the plans to the same scale.
Print the Plans
If you want to see the plans before you print them, you can see a bigger version by clicking on the graphics above. But the best way to print them is to usually to click the following link to download the PDF version:
- O scale plans - 1:48 scale - print both pages
- S scale plans - 1:64 scale - only the following file is required: PDF File for Watchman's Shanty in S scale
- Standard Gauge/Large Scale plans - 1:29 - 3-4 pages
Select the print option, tell it to "auto rotate and center" (or whatever else you need to select to make it go the right way on the paper). Don't select the "scale to page" or "shrink to fit" option unless you need to reduce the size of the printout (see below). Print. When you get your printout, double-check the measurements with a ruler.
Note: On some printers, a small portion of the image may disappear at the outside edge of the page. But you can easily "fill in the details" by looking at the jpg versions.
If you don't have Adobe Acrobat Reader on your computer or for some reason that doesn't work, you can open the big JPG versions by clicking on the reduced plans above. You will probably have to experiment and tweak the sizes to get them just right, though - that's why the PDF version is more likely to work for you.
If neither of those work, contact
Paul and ask him for help - that's his department. :-)
Cut Out the Structure Pieces
Assemble your materials:
- The shanty body and sub-roof should be heavy, single layer cardboard, like the back of a writing tablet.
- The roof cap, door, and windowframes can be a lighter cardboard, like the cardboard from a cereal box.
- The base can be cut from corrugated cardboard.
- The building foundation should be corrugated cardboard or foam core board.
- For O or S scale, the chimney can be a candy apple stick or the like. For a larger scale, you may use the shell of a Bic pen or something similar.
Cut carefully.
 Carefully transfer the patterns of all pieces to the cardboard building stock. A .05 mm lead mechanical pencil and a “C-Through” brand ruler make this accurate and easy. Carefully transfer the patterns of all pieces to the cardboard building stock. A .05 mm lead mechanical pencil and a “C-Through” brand ruler make this accurate and easy.
- Put new blades in the mat knife or X-acto knife (or both) that you will be using.
- Score the fold lines before you begin cutting out the main station parts. Use the metal ruler or other steel edge as a guide.
- Still using a steel-edged ruler as a guide, cut out the shapes. Watch your fingers.
Building the Base
The base is a rectangular "box" built up from corrugated cardboard. It will also have a "foundation" piece that sits just inside the building's shell to help it stay in place.
- Make the base from three or four layers of corrugated cardboard glued together in a sandwich.
- Wrap and glue a strip of cereal-box cardboard all around it to camouflage the rough edges of the corrugated cardboard.
- When the base is built, cover it with white bond paper just like you would wrap a gift, except that all surfaces of the paper cover must be glued down to the box. A glue stick works great for this.
Note: For more information about building bases, please see our Glitterhouse Bases article.
 After you have built the base, cut the foundation piece out of corrugated cardboard or foam board and set it loosely on the base. When you get the shanty built, position it over the foundation to make certain it is a secure, but not overly tight fit. Then you may glue the foundation in place. After you have built the base, cut the foundation piece out of corrugated cardboard or foam board and set it loosely on the base. When you get the shanty built, position it over the foundation to make certain it is a secure, but not overly tight fit. Then you may glue the foundation in place.
Painting the Base
Once you're certain of the fit, prime the base and paint it with several coats of glossy paint in the color of your choice. Industrial gray was the color most often chosen for this kind of base in the tinplate days.
Assemble the Shanty Body
Note: You'll notice that there is some "hurry up and wait" involved with this portion of the project. That's one reason I often work on more than one building at a time.
White glue works best if you apply a thin coat to each mating surface and wait a few moments for the glue to become tacky.  Do not glue the building to the base until the instructions say to. You CAN check the fit as you progress by setting it on the foundation, if you wish. Do not glue the building to the base until the instructions say to. You CAN check the fit as you progress by setting it on the foundation, if you wish.
Fold the shanty walls where you have scored them and glue the tabs that hold them together.
Glue the folds that will support the roof together as well. Be sure to check it every so often in case something has slipped out of place.
In the photo the right, you can see that I cut a hole through the folded roof pieces for the chimney to pass through. This doesn't have to be an exact cut, since the roof will cover any jaggies.
Assemble the Roof
The sub-roof should be a heavy solid cardboard, like the back of a writing tablet.
- Score the line where
 the crease will be on the sub-roof, then check the fit on the shanty body. the crease will be on the sub-roof, then check the fit on the shanty body.
- When you are satisfied, score and crease the top layer of the roof as well. Again, check the fit.
- Glue the roof layers together. You will probably need clothespins and some method to clamp these pieces so they stay folded at the correct angle as the glue dries. Be sure to check it every so often as it dries in case something has slipped out of place.
- The "ridge" cap is a piece of thin single-layer cardboard. Crease carefully and check the fit. When the two roof layers seem solid, glue the ridge cap on.

- I used a punch to make the hole for the stove pipe.
Do not glue the roof to the body until the instructions say to. You CAN check the fit as you progress by setting it on the body, if you wish.
In the photo to the right, the roof, body and base have been set together to check the fit and the overall look, but the pieces are not glued together quite yet. You can use a "test fitting" like this to make certain that the foundation where you need it to be and it is the right size.

Assemble the Door and Windows
I used a Xacto knife to cut the door and window from thin cardboard, like the kind on cereal or Kleenex boxes. Then I primed them, painted them with glossy red paint, and let them dry.
For the glazing, I cut squares of the translucent plastic from cereal box liners, then I cut squares of light blue paper to put behind them to give them a bluish tinge.
 Glue around the edges, being careful not to get glue on the part of the glazing that shows through the windows - that will take on a distinctively different color. Glue around the edges, being careful not to get glue on the part of the glazing that shows through the windows - that will take on a distinctively different color.
Paint the Components
 Prime each component with a flat white undercoat, then, after that has dried thoroughly, paint the top coat in the color of your choice. It can be glossy, to imitate the original tinplate structures. If you don't have something shiny, don't worry too much; you're going to finish this project with a glossy spray topcoate. Prime each component with a flat white undercoat, then, after that has dried thoroughly, paint the top coat in the color of your choice. It can be glossy, to imitate the original tinplate structures. If you don't have something shiny, don't worry too much; you're going to finish this project with a glossy spray topcoate.
Glue the Components Together
I glued the door and windows to the shanty first. Then I glued the rest together and admired my work as it dried. When it was completely dry - the next day - I hit it with several light coats of glossy spray. This part is more art than science - if you get the spray on too thin, it looks more satiny than glossy - if you get it too thick, it runs. But you're better building up several light coats than trying to make the building as shiny as a new toy all in one pass.
Conclusion
You can see that, when you get to the gluing, painting, and "laquering" stages, there's a lot of "hurry up and wait." That's one reason many people who build this sort of project often work on two or three structures at the same time - you can work on the second house while the glue is setting on the first one, and so on.
 I'm on the lookout for a little watchman who's the right scale for this building. In the meantime, Paul suggested a "crossbuck" railroad crossing sign, so I did a little R&D, and Paul did some graphics, so we have another project that will dress up any corner of your railroad. I'm on the lookout for a little watchman who's the right scale for this building. In the meantime, Paul suggested a "crossbuck" railroad crossing sign, so I did a little R&D, and Paul did some graphics, so we have another project that will dress up any corner of your railroad.
Commercial "Plug" - Now that I'm in "retirement," this hobby has become a sort of avocation for me. Several folks have commissioned me to build specific houses for them. I often provide an "artist's conception" to make certain I understand what they want. Sometimes the "artist's conception" needs to be tempered by adjustments to make the house fit in better with the other houses it will be joining, as well as color and accessory changes. But it all starts, quite literally, at the drawing board.
Perhaps you had a toy or pasteboard structure when you were young and would like to have a replica made. Or you have an idea for something that's never been done. If you can find a photo or hash out a drawing or anything else to give me some idea of what you're looking for, that can be enough to get started.
If you'd like me to help you design and/or build a project for you, or if you have any questions at all, please see my site, LittleGlitterHouses.com for more information.
Looking for Your Ideas, Projects, or Photos - Also, if you have similar project, ideas, or photos that you'd like to share with your fellow readers and hobbyists, we'd love to add them to our sites, and we'll be sure to give you full credit for your contribution.
Conclusion
If you like this project, stay in touch - more "Tribute to Tinplate(tm)" projects are on the way. In the meantime, you might like to take a look at the following projects.
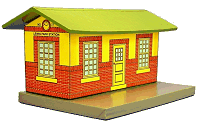 Building a Vintage "Lithographed" Station" - the first article in our "Tribute to Tinplate" series, based on a prewar American Flyer standard-gauge station. Includes free, downloadable graphics, plans, and instructions for modeling in O/S and Large Scale/Standard Gauge. Building a Vintage "Lithographed" Station" - the first article in our "Tribute to Tinplate" series, based on a prewar American Flyer standard-gauge station. Includes free, downloadable graphics, plans, and instructions for modeling in O/S and Large Scale/Standard Gauge.
- Building a Vintage Tin-Style Cottage
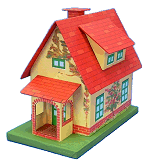 - This project is inspired by a popular pre-war tinplate house that was made to go with standard gauge trains, like the early 1900s-era Ives and Lionel. Paul Race's commercial-quality graphics, as well as Howard Lamey's plans and assembly details are all free, to give your railroad a vintage tinplate look with a few cents' worth of materials. Many options are available, and most graphics and plans can be downloaded directly from the article. - This project is inspired by a popular pre-war tinplate house that was made to go with standard gauge trains, like the early 1900s-era Ives and Lionel. Paul Race's commercial-quality graphics, as well as Howard Lamey's plans and assembly details are all free, to give your railroad a vintage tinplate look with a few cents' worth of materials. Many options are available, and most graphics and plans can be downloaded directly from the article.
 New
Feature - Building a Tinplate-Inspired Lamp Post The ideal accessory for the Lewis Park Station, or any station or city hall on your railroad or holiday village. No, they don't actually light, but they are cheap and easy to build and add a great deal of vintage interest to any setting. Free downloadable plans are available in several scales. New
Feature - Building a Tinplate-Inspired Lamp Post The ideal accessory for the Lewis Park Station, or any station or city hall on your railroad or holiday village. No, they don't actually light, but they are cheap and easy to build and add a great deal of vintage interest to any setting. Free downloadable plans are available in several scales.
 New
Feature - Building a Tinplate-Inspired Railroad Crossing Sign This is the ideal accessory for the Watchman's Shanty project. Based on a series of products that are now available only as expensive collector's items, this easy and almost-free project will add texture, interest, and period to any model railroad or holiday village. New
Feature - Building a Tinplate-Inspired Railroad Crossing Sign This is the ideal accessory for the Watchman's Shanty project. Based on a series of products that are now available only as expensive collector's items, this easy and almost-free project will add texture, interest, and period to any model railroad or holiday village.
- Easy Street Scene - This new
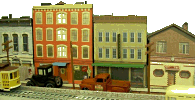 building project uses downloadable building graphics and a little cardboard or foam board to build up a convincing downtown scene that is only a few inches deep - perfect for shelf layouts, tight spots, and dioramas. We also provide links to high-resolution graphics that will work for any scale. building project uses downloadable building graphics and a little cardboard or foam board to build up a convincing downtown scene that is only a few inches deep - perfect for shelf layouts, tight spots, and dioramas. We also provide links to high-resolution graphics that will work for any scale.

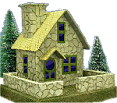 Build a Vintage-Style Cardboard Stone Cottage - This building project is made like the vintage cardboard houses folks used to set around their Christmas tree in the early 1900s (before glitterhouses became common), but its design was inspired by a building that shows up on the "Isle of Sodor." The building uses free downloadable graphic paper to put a realistic stone veneer on an old-world cottage and fence. It works with Christmas villages, or with a little customization, would dress up any indoor railroad. A "brick cottage" option is also shown.
 Log Cabin Building Flat - This "building flat" uses downloadable graphics and foam board or cardboard to dress up a narrow corner of your railroad or village. The techniques in this project can be used for almost any kind of building you want to represent in a tiny space. December, 2007 Log Cabin Building Flat - This "building flat" uses downloadable graphics and foam board or cardboard to dress up a narrow corner of your railroad or village. The techniques in this project can be used for almost any kind of building you want to represent in a tiny space. December, 2007
- Build a Vintage-Style Barn and Silo - This
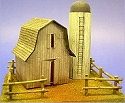 building project uses downloadable graphics to put realistic shingles and siding on an old barn and silo. Like the stone cottage above, it works with Christmas villages, or with a few changes, it would dress up an indoor railroad. building project uses downloadable graphics to put realistic shingles and siding on an old barn and silo. Like the stone cottage above, it works with Christmas villages, or with a few changes, it would dress up an indoor railroad.
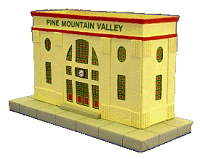 Building the Union Station - This original project by designer Howard Lamey is inspired by two traditions - the cardboard Christmas houses that were popular in US homes between 1928 and 1965 and the Lionel station that was popular for most of the 20th century. Building the Union Station - This original project by designer Howard Lamey is inspired by two traditions - the cardboard Christmas houses that were popular in US homes between 1928 and 1965 and the Lionel station that was popular for most of the 20th century.
Other Articles about cardboard houses include:
|


|



 Building a Vintage "Lithographed" Station"
 New
Feature - Building a Tinplate-Inspired Lamp Post
 New
Feature - Building a Tinplate-Inspired Railroad Crossing Sign


 Building the Union Station


