 | |||
 |  |  |
 |  |
 |  | ||
 |  | ||
 |  | ||
for Big Indoor Trains™ |
|
|
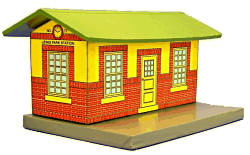
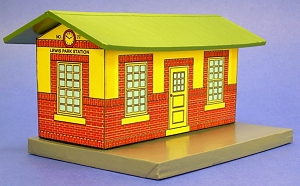
Although one could build our "Tribute to Tinplate" structures from sheet tin, we are making them from cardboard. Ironically, this reflects yet another tradition - when tinplate trains and towns were in vogue, Japanese companies manufactured heavily-shellacked cardboard houses and stations that you could use to supplement your empire. Today putz house collectors call these old Lionel and Ives-inspired cardboard houses "Lackies," because of the lacquer that made them almost as shiny as the metal structures that inspired them. If you're an O-gauge collector, you'll recognize a lot of influence from the American Flyer Hyde Park Station, a lithographed, stamped metal station made in the early 20th century. - Paul Lewis Park StationThis is an easy project that was designed to look good with vintage trains. When Paul sent me the original graphic, he let me decide what size roof and platform to include, so I printed out a copy in black and white (saving my inkjet's cartridges) and made a mock-up before I began the final structure.Because this doesn't require a lot of window-frame cutting, the mockup went together pretty fast. When I went back and did the "final structure," I was more careful, but it still went together faster than most of our cardboard house projects. What You Will Need
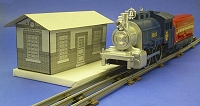
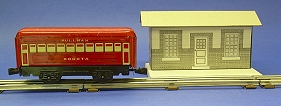
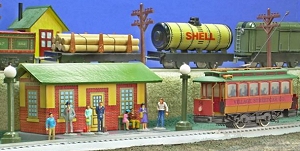
A Note about ScaleMany early O-gauge and O27 trains are more like toys than models, so the "scale" of the trains and accessories are all over the map. A few pieces even are closer to HO (1:87) in scale than they are to O (usually 1:48). On the other hand, some accessories made to go with O27 trains are half again as large as they should be, since they're holdovers from earlier Standard Gauge products. So if you want your tinplate-inspired projects to look right with your existing equipment, you probably want to do a "mockup" first, as I did. As you can see, the station looks a tad small next to a Lionel "Docksider"-style engine (which is a fairly small locomotive). However it looks plenty big next to the Marx passenger car I plan to use with it.
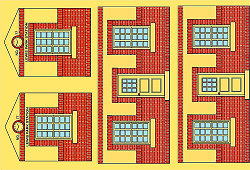
This project's appearance is based on an existing American Flyer model that was made to go with Standard gauge trains, but its size has been adapted to look good with my Marx tinplate trains. The mockup verified that. On the other hand, if you want the station to look good with the bigger Lionel O gauge trains, you might want to bump up the size a little when you print. If you want to go "way up," start with the Standard Gauge plans and shrink them as you print. Or you may have the "chops" to manipulate the JPG version. Print the PatternsThis project has a structure pattern that you will need to cut out and transfer to cardboard, as well as a station wall graphic sheet that you will use to finish your station's appearance. Graphic sheets are also available to go with Standard or Large Scale trains - these are about 1.6 times the size of the "O" version, so you'll have to adjust the measurements of the other pieces accordingly. Again, doing a mock-up to make certain the finished structure will look right with your existing equipment is very important.You may print the structure pattern on any sort of paper, since you're simply using this to transfer the plan to your cardboard medium. However the "lithograph" graphic should be printed on acid-free heavy paper or card stock.
Printing the Plans - We've provided two versions to help you print the plans at the size you need.
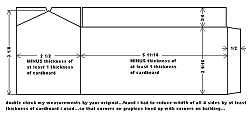
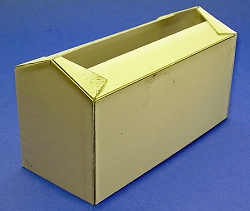
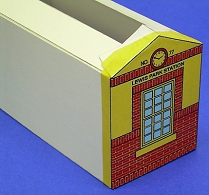
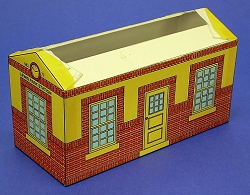
Building the Station BackingI cut out the backing pieces for the side and end walls before I mounted the graphics to them. Note that you should adjust the lateral measurements of the backing pieces so that they are slightly less than the size of the lithograph sheet. (If a backing piece is a tiny bit narrower than it should be, you can nip an extra bit off of the lithograph sheet to make it fit, and camouflage the cut with a fine-tip marker. If a backing piece is a tiny bit wider than it should be, it's pretty hard to stretch the graphic paper to cover it.) I scored the folds and glued the walls together in a rectangle. Then I cut out a piece of scrap cardboard to test the size of the roof.
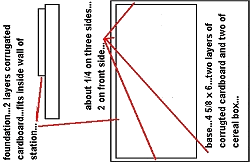
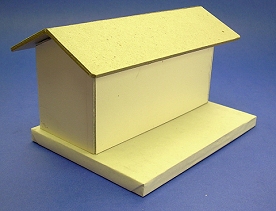
Building the BaseThe base is a rectangular "box" built up from corrugated cardboard. It should be about 6" x 4 5/8" x 1/2" if you want to retain the relative proportions of the original structure. [Editor's note: I'd probably go a little more realistic here, and have an extra couple of inches in both directions so the little people and their imaginary baggage carts can walk or roll around all four walls of the station. But that's not the way the original tinplate building was made - Paul]
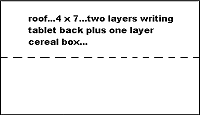
Painting the BaseOnce you're certain of the fit, prime the base and paint it with several coats of glossy paint in the color of your choice. Industrial gray was the color most often chosen for this kind of structure in the tinplate days.Building the RoofOnce you are satisfied with the dimensions of the roof, build it up from layers. I used two layers of thick cardboard from the back of writing tablets, then the top surface was cereal box cardboard, chosen because it is relatively smooth and takes a crease nicely.Make certain that as the glue dries, the roof stays bent at the correct angle to fit over the structure properly. There is no printing on the original, so I finished the roof by priming, then painting it with several colors of glossy deep green paint. Apply the Graphics
Finish
When that is dry, glue the whole building together. I would add another coating or two of acrylic spray for good measure. However it won't soak in anywhere on the structure by now, so be careful to keep your coats light.
ConclusionIf you like this project, stay in touch - more are on the way. In the meantime, you might like to take a look at the following projects.
Other Articles about cardboard houses include:
To Return to the BIG Indoor Trains(tm) Primer Page, click here. |


|


|

|  |
 |
 |  |  |
Note: Big Indoor Trains(tm), Big Train Store(tm), Family Garden Trains(tm), Big Christmas Trains(tm), Garden Train Store(tm), and Trains and Towns(tm) are trademarks of Breakthrough Communications (www.btcomm.com). All information, data, text, and illustrations on this web site are Copyright (c) by Paul D. Race. Reuse or republication without prior written permission is specifically forbidden.
For more information, contact us.
