|
|
Note from Editor: Howard Lamey, in Jacksonville, Florida, has retired from a full-time job in advertising that included designing window displays for a major retailer. Now he has turned those artistic talents to designing and building vintage-style cardboard buildings for his family and friends. Howard now has his own site, LittleGlitterHouses.com, but he continues to graciously share his craft knowledge with our readers.
Building the Peach Cottage Beach House
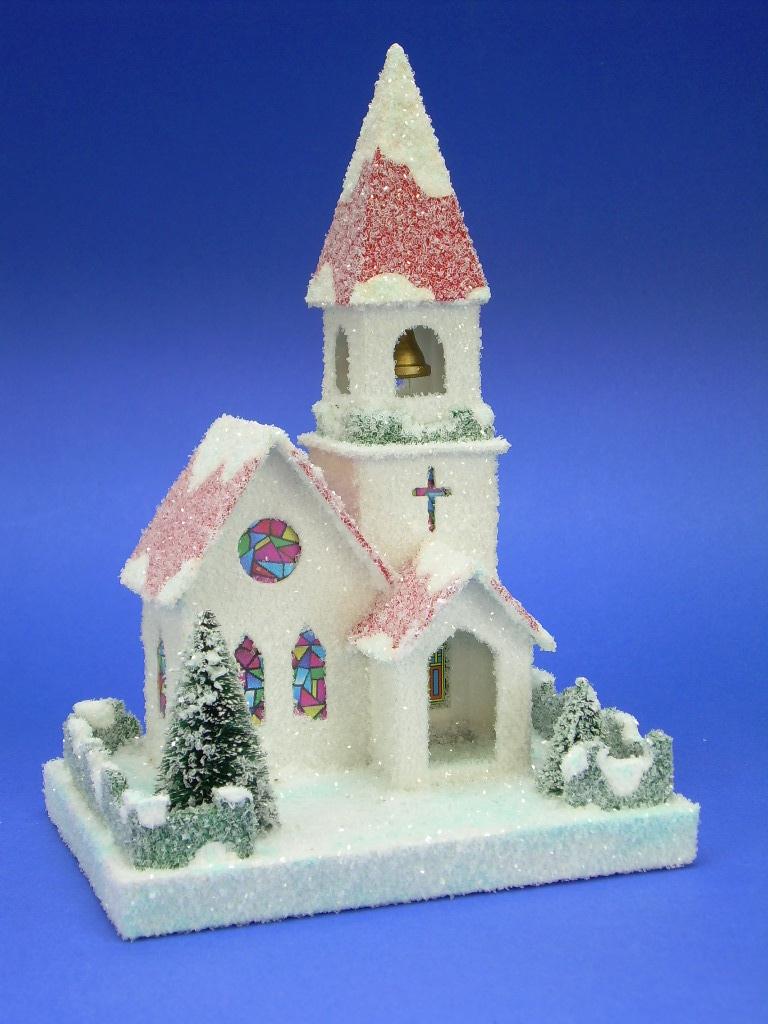
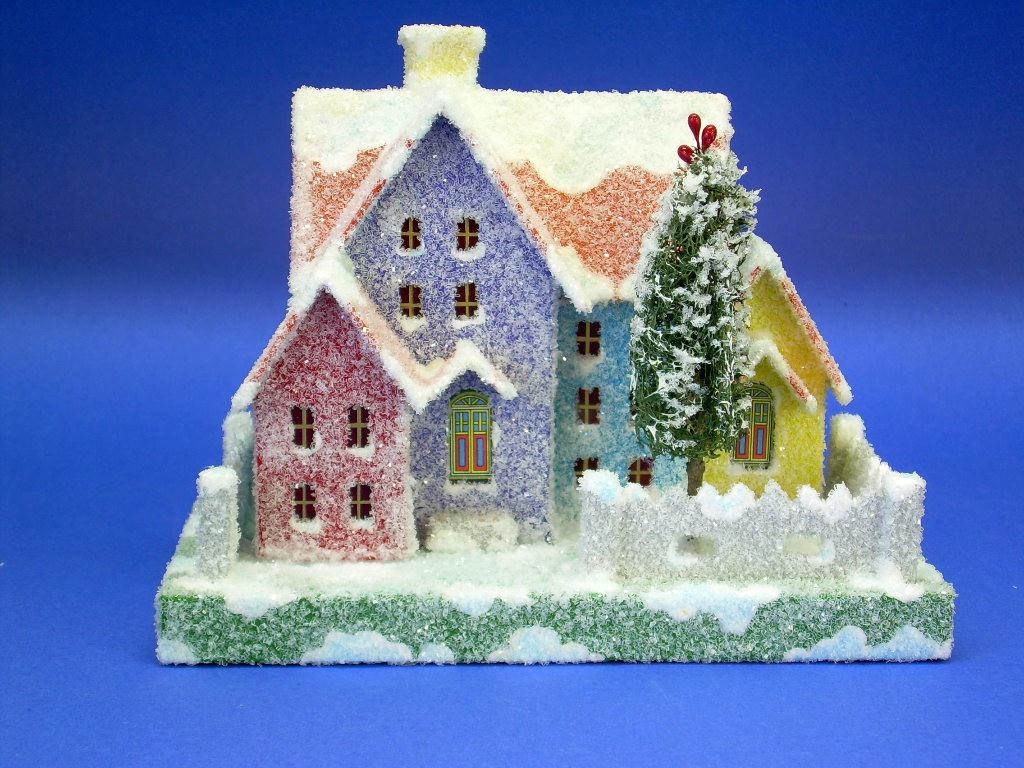
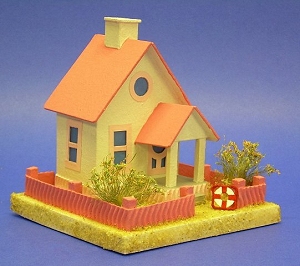 This project is a followup to our Sandy Shores™ Lighthouse and Twin Peaks structures that were published in January and March, 2009. We have finished this house in "seaside" colors that are typical of seaside houses in many parts of the United States. If you like the shape, of course, you are certainly welcome to use other colors and refinish it for a Halloween or Christmas village. If you do make one, please send us photos - seeing our projects get used is our best reward for providing them. This project is a followup to our Sandy Shores™ Lighthouse and Twin Peaks structures that were published in January and March, 2009. We have finished this house in "seaside" colors that are typical of seaside houses in many parts of the United States. If you like the shape, of course, you are certainly welcome to use other colors and refinish it for a Halloween or Christmas village. If you do make one, please send us photos - seeing our projects get used is our best reward for providing them.
What You Will Need
First of all, you need cardboard, such as that from cereal boxes, the backs of writing tablets, anything flat, firm and clean, that you can save. Please keep some corrogated cardboard on hand, too - it makes the best bases.
In addition, for this project you'll need:
- A sharp mat knife or Xacto knife (or both)
- A stiff metal ruler
- Elmer's white Glue-All. A glue stick would also come in handy.
- Several sheets of acid-free white bond paper
- Colored paper for the windows. You can make your own color up and print it onto paper or vellum if you wish.
- If you want, you can use colored card stock for the windowframes (or you could use cereal-box cardboard, but you'd have to paint it).
- Fine sand for mixing into the primer when you prime the house to give it a little extra texture (optional - this sand can be found in the craft or floral department at your local craft store. It is inexpensive, clean, and uniform in size. I recommend you choose white or a neutral color.)
- Coarser sand for gluing to the base. I used aquarium sand; you can use "play" sand, swimming pool filter sand, whatever looks right with the rest of your setting.
- Flat white paint (flat latex interior wall paint is good) to prime the building (and give it the chalky feel of the original)
- The fence pieces and foundation trim are made from specialized card stock I bought at a craft store. If you patronize specialty coffeehouses, you might find cardboard cupholders with a similar pattern, though you may need to reinforce it to get it to work as a fence.
- The fence posts and porch posts are made of scrap wood stock. The fence posts are 1/4"x1/4" stock. I used a wider stock for the porch posts.
- Acrylic paint in the colors you plan to use for the house. Include a neutral sand or beige color for painting the base.
- Other accessories, such as palm trees or sea grass, that you plan to use to finish the house.
Note: Our article on What You Need to Build Glitterhouses lists many other materials and tools that will help you work more quickly and effectively.
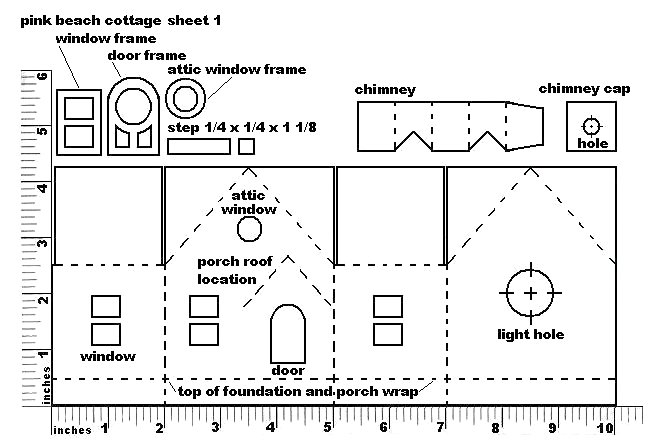
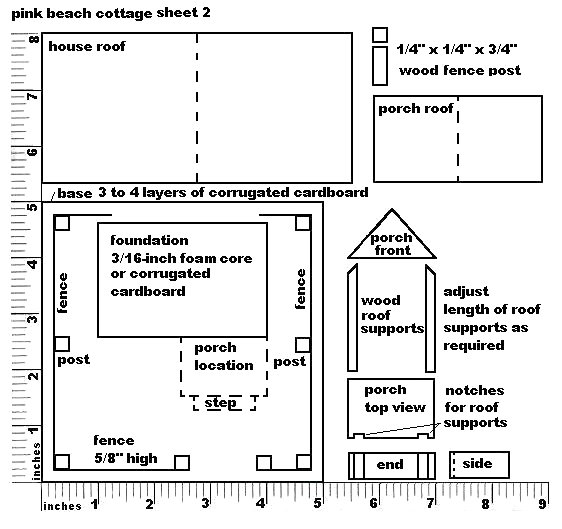
Printing the Plans
Double-click on the plans above to see the large versions. You should be able to print the big version at the size you need either of the following ways.
If neither of those work, contact
Paul and ask him for help - that's his department. :-)
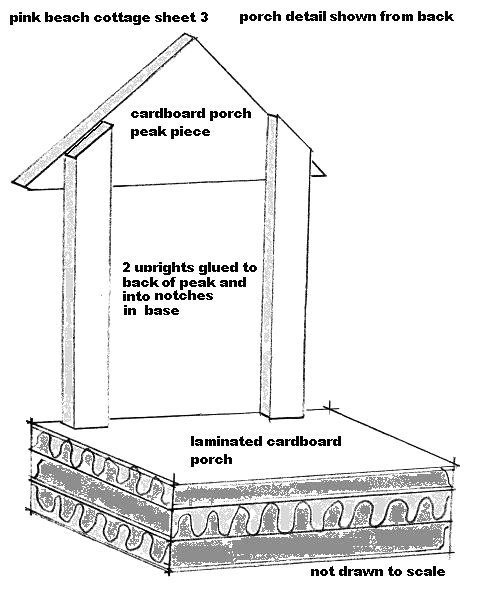
Building the Base
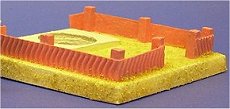
The base is a rectangular "box" that is decorated before the house and doghouse are installed. For this project, it should be about 6" long, 3 3/4" wide, and about 1/2" high.
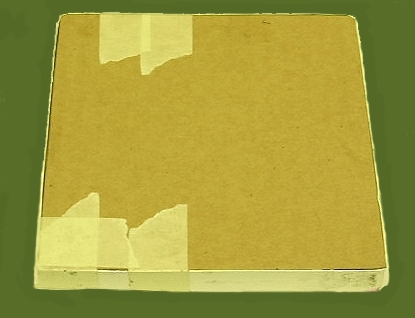
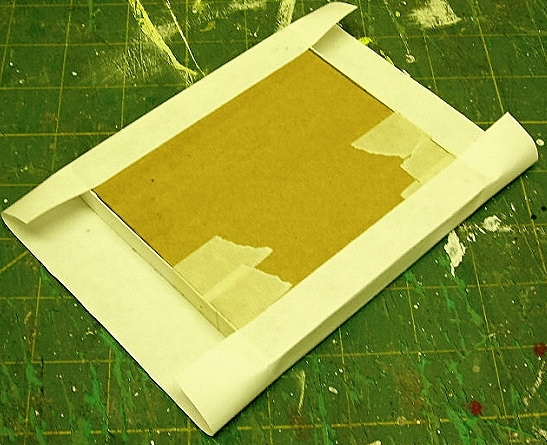
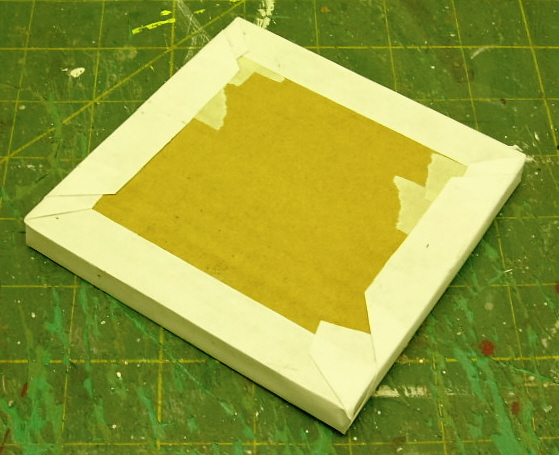
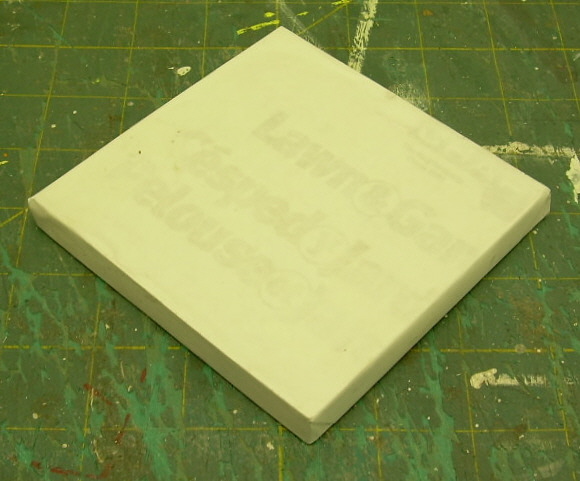
Cut And Glue The Base - Usually the best method is to make a base from layers of corrugated cardboard glued together in a sandwich. You then wrap and glue a strip of thin poster-board or cereal-box cardboard all around it to camouflage the rough edges of the corrugated cardboard.
Wrap the Base - When the base is built, you then cover it with white bond paper just like you would wrap a gift, except that all surfaces of the paper cover must be glued down to the box. A glue stick works great for this.
Note: For this project I also added a sub-base for the house. This is a rectangle of thick corrugated cardboard that fit just inside the bottom edge of those structure (you'll need to trim it to fit). It gives the structure more strength, and provides more area to hold glue when you are gluing the structure to the base. In the photo further down, you can see that I glued the house's sub-base to the base before I painted the base. Later, I glued the house down around it. I also cut a hole in the middle of the sub-base to keep the C-6 or C-7 light bulb from being too close to the cardboard.
Note: More details about building bases are provided in our article: Building Glitterhouse Bases
Building the Fence and Porch Foundation
The porch's foundation is made from two or three layers of corrugated cardboard. Notch them to fit the wood stock that you will be using for your porch roof supports. After you've attached the supports, cover the front and both sides of the foundation with the specialized card stock.
If you wish, you may use different materials for the fence, including miniature wooden picket or snow fence from the craft store or a rustic rail fence you make from twigs.
When the glue on the base has dried, try the fence pieces and porch foundation on the base for a fit, but don't glue them down until you've tried the house pieces on for a fit as well.
Prepping the Structure Pieces
The house, roof, chimney, and chimney cap need to be cut from thick cardboard, such as the cardboard from the back of a writing tablet. The roofs could be made of picture frame matte board
- Carefully transfer patterns of all pieces to the cardboard building stock. A .05 mm lead mechanical pencil and a “C-Through” brand ruler make this accurate and easy.
- Put new blades in the mat knife or X-acto knife (or both) that you will be using.
- Score the fold lines before you begin cutting out the parts (although you may do the roof parts later, if you wish, after you've checked the fit and the overhang). Use the metal ruler or other steel edge as a guide.
- Still using a steel-edged ruler as a guide, cut out the shapes. Watch your fingers.
- Double-check the roof sizes. Each roof should have a fairly even overhang on all sides. After you determine where the peak of the roof should be, score the crease.
- Cut the door and window frames from thinner stock, such as posterboard, cereal box cardboard, or colored card stock.
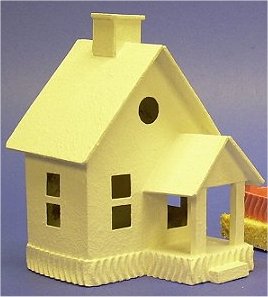
Assembling and Painting the House
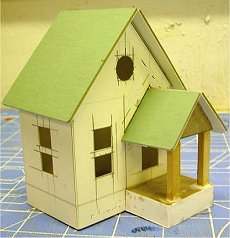 Using Elmer's white Glue-All or a similar product, assemble the house, glue on the roofs and chimney. I would do this in steps, clamp the pieces, and let them dry so that you are not trying to hold, tape, or clamp a lot of small pieces at one time. Using Elmer's white Glue-All or a similar product, assemble the house, glue on the roofs and chimney. I would do this in steps, clamp the pieces, and let them dry so that you are not trying to hold, tape, or clamp a lot of small pieces at one time.
White glue works best if you apply a thin coat to each mating surface and wait a few moments for the glue to become tacky. Do not glue the house to the base until you have applied the sand (below).
 I did not apply the windowframes until I had doublechecked the fit, so they're not shown in all photos. I did not apply the windowframes until I had doublechecked the fit, so they're not shown in all photos.
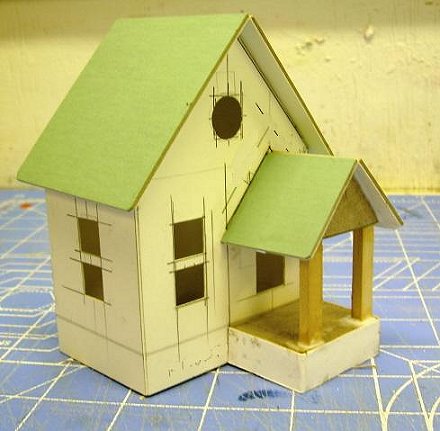
The photo to the right shows the house set in place on the base to make certain that they fit where they're supposed to before we paint everything and glue it together.
- If you have cut the door and windowframes from cardboard stock, glue them on now. If you used colored stock, wait until after you've painted the structure.
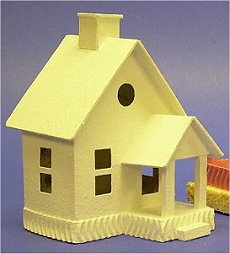
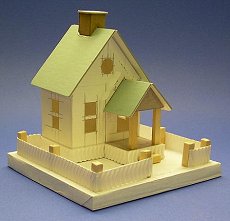
- Prime the house, base, and fence with flat white wall paint. Don’t skip this step; it gives you a uniform surface for painting the final coat.
- Paint the house in your choice of colors. I use acrylics from the Wal-Mart craft department. Note: If you wish to incorporate sand into the finish of the house, follow these instructions:
- As the primer is drying, get your sand ready to apply - you might consider using a salt-shaker.
- After the primer is very dry (such as overnight), make a small batch of a 50/50 paint in the color you've chose and Elmer's white glue.
- Working on only one surface at a time, brush the glue/paint mixture on, then sprinkle sand on it before the mixture starts to film over.
- Let that surface dry before you apply sand to the next one. (If you haven't figured it out already, now you know one reason Howard usually builds these little houses in batches of three or four.)
- If an area isn't covered evenly, touch it up with straight glue and more sand, and let THAT dry.
- Finish and glue on any remaining trim details, including door and window frames and awnings.
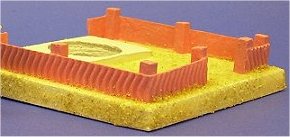
- Paint the base and fence. The base should be beige or sand color, something that will blend with the sand once you glue it on.
 Glue sand on the base. Brush a film of white glue on an area, then tamp down the sand into it. The glue dries clear, so don't judge the final effect until it's dry. You should probably count on doing this in at least 3 stages - if you try to do it all at once, you'll probably just make a mess you have to redo again anyway. Glue sand on the base. Brush a film of white glue on an area, then tamp down the sand into it. The glue dries clear, so don't judge the final effect until it's dry. You should probably count on doing this in at least 3 stages - if you try to do it all at once, you'll probably just make a mess you have to redo again anyway.
- Glue the window "glazing" material you have chosen on the inside of the house. If you have cut the windowframes from colored cardboard, glue them on now.
- Glue the finished house to the finished base. Fill in any gaps between the house and the base with white glue and sprinkle on more sand.
- Add accessories that suggest a beachfront property. For hints on making the seagrass that is shown in the title photo, refer to our article on Modeling Seagrass.
Conclusion
You can see that, when you get to the gluing, painting, and sanding stages, there's a lot of "hurry up and wait." That's one reason many people who build modern putz house recreations work on two or three houses at the same time - you can work on the second house while the glue is setting on the first one, and so on.
Also, if you have a similar project you'd like to share with your fellow readers and hobbyists, we'd love to add it to our site, and we'll be sure to give you full credit for your contribution.
Reader Feedback
 Blogger and crafter Rhonda C. writes: Blogger and crafter Rhonda C. writes:
I want to thank you both for all you've posted regarding Christmas and
these little houses. I've loved them for a long time and was delighted
to find so much information online. The patterns were so helpful and
the houses so much fun to make.
Rhonda has also posted detailed photographs of her process for making a Christmas glitterhouse based on one of Howard Lamey's beach house patterns. If you have trouble visualizing exactly what it looks like to have the cardboard and everything laid out while you're working on it, this is a great resource. Thanks, Rhonda.
Return to Howard's How-To's
|


|